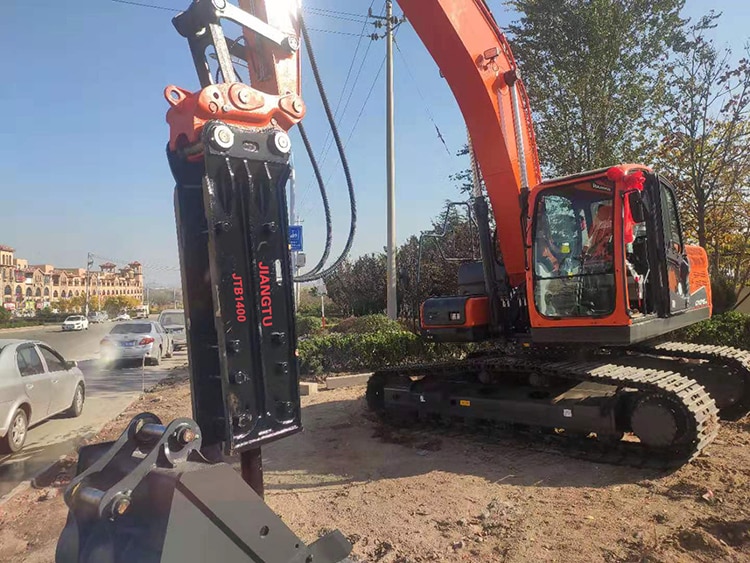
A Hydraulic Breaker, also known as a percussion hammer, is a heavy mechanical device used to demolish concrete, asphalt, or stone materials. Hydraulic breakers are commonly seen in road construction and are preferred due to their high performance. Most mini excavators can be installed differently Hydraulic Breakers.
This article is about the installation and removal of Hydraulic Breaker for Mini Excavator.
Fundamental circuit
When piping the hydraulic lines on-base machine, it is important to know the fundamental circuit to which the piping belongs. Then the piping can be connected correctly, properly and quickly
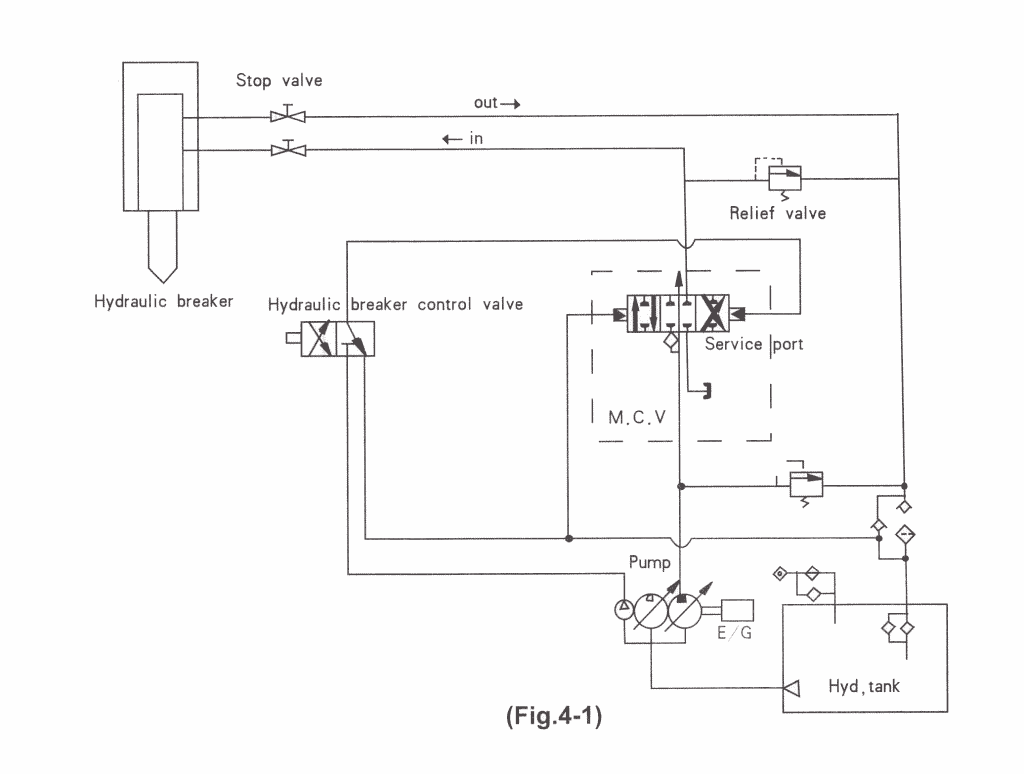
This Image is shown one of the simplest hydraulic circuits in the case of the installation of a service port into the main control valve of the base machine.
Tips: If the piping method is different from the Image, consult us or attachment manufacturer.
#kt-layout-id_aede2a-b0 > .kt-row-column-wrap{align-content:start;}:where(#kt-layout-id_aede2a-b0 > .kt-row-column-wrap) > .wp-block-kadence-column{justify-content:start;}#kt-layout-id_aede2a-b0 > .kt-row-column-wrap{column-gap:var(–global-kb-gap-md, 2rem);row-gap:var(–global-kb-gap-md, 2rem);padding-top:var( –global-kb-row-default-top, 25px );padding-bottom:var( –global-kb-row-default-bottom, 25px );padding-left:20px;padding-right:20px;grid-template-columns:minmax(0, 1fr);}#kt-layout-id_aede2a-b0{border-top-left-radius:8px;border-top-right-radius:8px;border-bottom-right-radius:8px;border-bottom-left-radius:8px;overflow:hidden;isolation:isolate;border-color:var(–global-palette3, #1A202C);border-top-width:1.5px;border-right-width:1.5px;border-bottom-width:1.5px;border-left-width:1.5px;}#kt-layout-id_aede2a-b0 > .kt-row-layout-overlay{opacity:0.46;}#kt-layout-id_aede2a-b0 ,#kt-layout-id_aede2a-b0 h1,#kt-layout-id_aede2a-b0 h2,#kt-layout-id_aede2a-b0 h3,#kt-layout-id_aede2a-b0 h4,#kt-layout-id_aede2a-b0 h5,#kt-layout-id_aede2a-b0 h6{color:var(–global-palette3, #1A202C);}#kt-layout-id_aede2a-b0 a{color:var(–global-palette3, #1A202C);}#kt-layout-id_aede2a-b0 a:hover{color:#e76106;}@media all and (max-width: 1024px){#kt-layout-id_aede2a-b0 > .kt-row-column-wrap{grid-template-columns:minmax(0, 1fr);}}@media all and (max-width: 767px){#kt-layout-id_aede2a-b0 > .kt-row-column-wrap{grid-template-columns:minmax(0, 1fr);}}
Read More: The working principle of excavator attachments
- The Working Principle of Hydraulic Breaker
- The Working Principle of Excavator Ripper
- The Working Principle of Hydraulic Auger
- Hydraulic Grapple Working Principle
- The Working Principle of Quick Hitch Coupler
- The Working Principle of Skid Steer Tree Spade
- The Working Principle of Skid Steer Snow Throwers
General view
Check the piping lines for the correctness of such as pressure, flows or pressure loss, if the hydraulic pipe once are installed in the base machine.
A pressure control valve has to be installed if there is no pressure control valve on the main control valve of the base machine.
The standard view of the installation
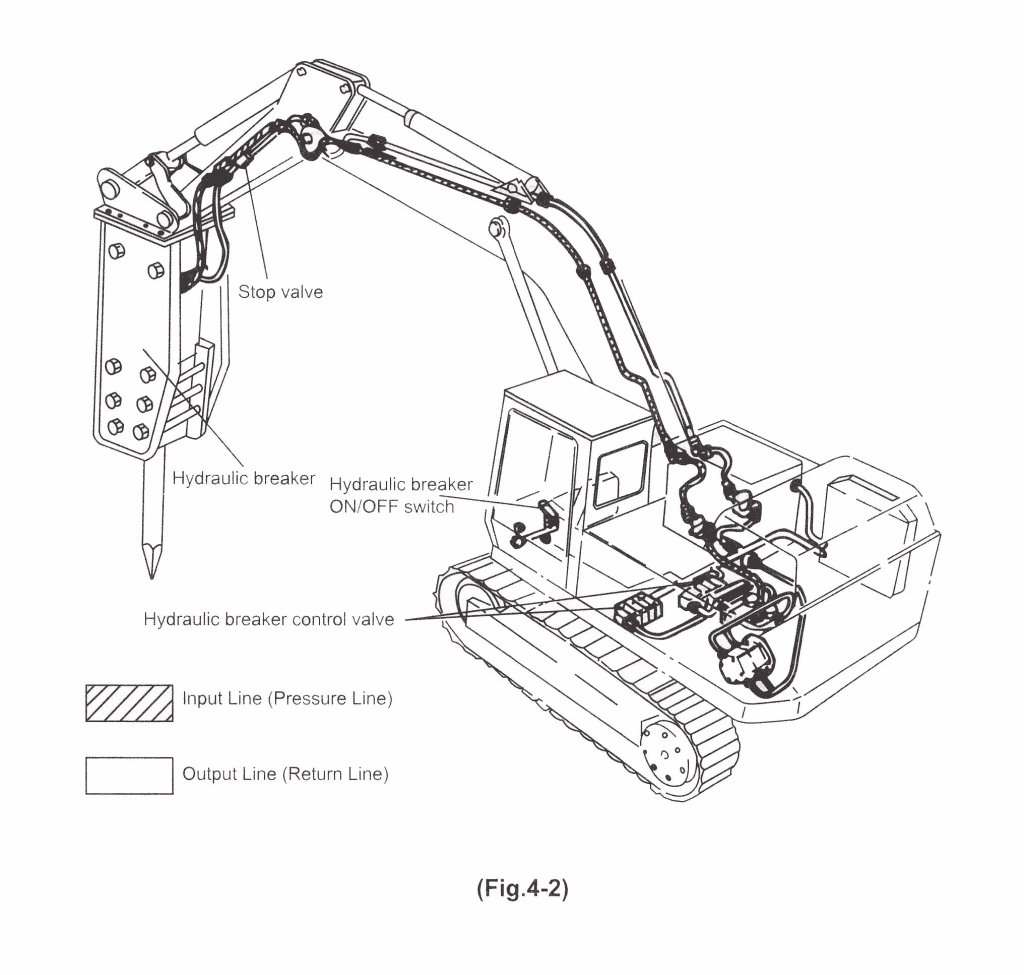
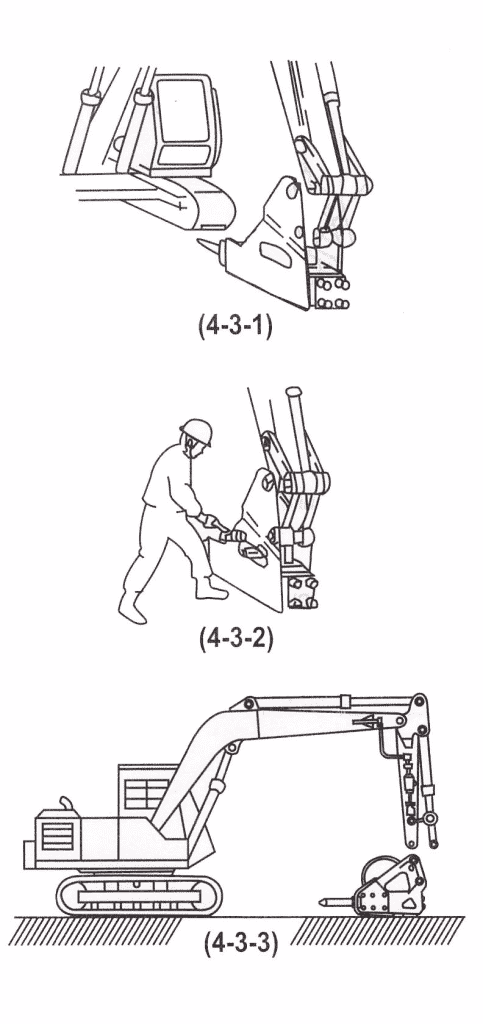
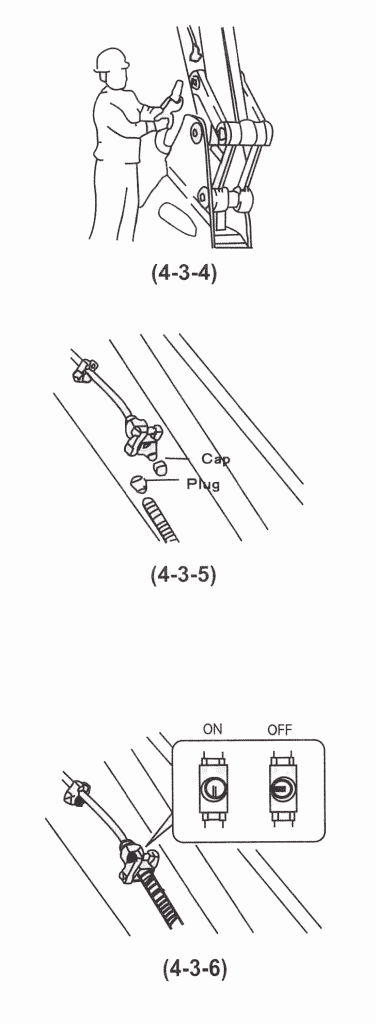
Installation of Hydraulic Breaker
| Model | Hose Diameter (inch) | Length (mm) | Working Pressure (bar) |
| 45/53/68/75 | 1/2 | 1450 | 140 |
| 85/100 | 3/4 | 1850 | 170 |
| 135/140(A) | 1 | 2300 | 180 |
| 150/155 | 1 | 2500 | 180 |
| 165(F) | 1-1/4 | 2800 | 190 |
| 175 | 1-1/4 | 3000 | 200 |
Notice:
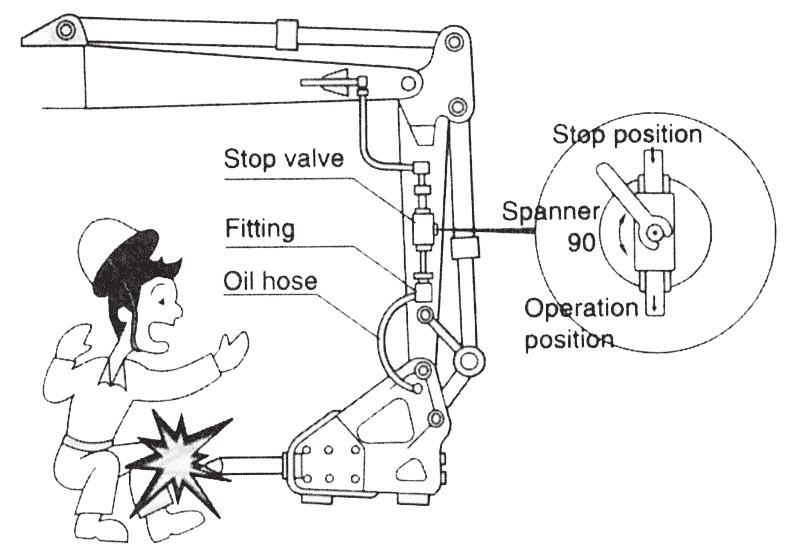
Removal of Hydraulic Breaker
Notice:
JIANGTU Attachments, as a breaker manufacturer for 12 years. We could provide various types of hydraulic hammer breakers and the chisel selection recommendation and installation instructions for you. If you have any questions, please feel free to contact us.
JIANGTU Excavator Break adopts special carbon steel material and heat treatment processes to ensure that the wear of the piston hitting surface is minimized and the service life of the piston is maximized.
Piston production adopts precise tolerance control to ensure that the piston and cylinder can be replaced with a single product, reducing maintenance costs.
The shell of the breaker has put forward higher and higher requirements for its sealing system. The NOK brand oil seals ensure our hydraulic breaker has low (zero) leakage, low friction and wear, and long service life.
.kadence-column_6bb113-5b > .kt-inside-inner-col{border-top-width:0px;border-right-width:0px;border-bottom-width:0px;border-left-width:0px;}.kadence-column_6bb113-5b > .kt-inside-inner-col,.kadence-column_6bb113-5b > .kt-inside-inner-col:before{border-top-left-radius:0px;border-top-right-radius:0px;border-bottom-right-radius:0px;border-bottom-left-radius:0px;}.kadence-column_6bb113-5b > .kt-inside-inner-col{column-gap:var(–global-kb-gap-sm, 1rem);}.kadence-column_6bb113-5b > .kt-inside-inner-col{flex-direction:column;}.kadence-column_6bb113-5b > .kt-inside-inner-col > .aligncenter{width:100%;}.kadence-column_6bb113-5b > .kt-inside-inner-col:before{opacity:0.3;}.kadence-column_6bb113-5b{position:relative;}@media all and (max-width: 1024px){.kadence-column_6bb113-5b > .kt-inside-inner-col{flex-direction:column;}}@media all and (max-width: 767px){.kadence-column_6bb113-5b > .kt-inside-inner-col{flex-direction:column;}}
Contact For Our Expert
Find out which attachment & Excavator works best for you!
.kadence-form-_b71a8f-dd .kb-form .kadence-blocks-form-field .kb-text-style-field, .kadence-form-_b71a8f-dd .kb-form .kadence-blocks-form-field .kb-select-style-field{color:var(–global-palette9, #ffffff);background:var(–global-palette3, #1A202C);}.kadence-form-_b71a8f-dd .kb-form .kadence-blocks-form-field .kb-text-style-field:focus, .kadence-form-_b71a8f-dd .kb-form .kadence-blocks-form-field .kb-select-style-field:focus{color:var(–global-palette9, #ffffff);}.kadence-form-_b71a8f-dd .kb-form .kadence-blocks-form-field .kb-forms-submit{color:var(–global-palette3, #1A202C);background:rgba(50, 150, 255, 0.92);border-color:var(–global-palette3, #1A202C);box-shadow:2px 2px 3px 0px rgba(0, 0, 0, 0.2);}.kadence-form-_b71a8f-dd .kb-form .kadence-blocks-form-field .kb-forms-submit:hover, .kadence-form-_b71a8f-dd .kb-form .kadence-blocks-form-field .kb-forms-submit:focus {color:#156fce;border-color:#1575d5;box-shadow:2px 2px 3px 0px rgba(0, 0, 0, 0.4);background:var(–global-palette3, #1A202C);}
.kadence-form-_b71a8f-dd .kadence-blocks-form-field.kb-submit-field { display: none; }
Related Articles

How to Select Breaker Chisel Tools for Hydraulic Hammer

Why Hydraulic Breaker Need Nitrogen and How to Charge

Select Guide For Hydraulic Breaker Hammers – According to Productivity Rate

Tips to Maximize Hydraulic Breaker Life

How To Select Hydraulic Breaker/Hammer For Your Program?

What is Hydraulic Breaker and How Does It Work?

How to Adjust Hydraulic Breaker for Mini Excavator

Hydraulic Breakers Trouble Shooting and Solution

